Have you ever looked at your backyard storage sheds and thought, ‘There’s got to be more to this than just storing old tools?’ Well, we certainly have! We’re here to show you how to turn those underutilized backyard storage sheds into a cool, functional space for your favorite hobbies. It’s not as hard as you might think, and the payoff is huge.
Key Takeaways
- Before you start anything, really look at your backyard storage sheds and figure out what you need for your hobby space.
- Good insulation and power are super important for making your new hobby room usable all year round.
- Think about how you’ll lay out your stuff and where everything will go to make your hobby time easy and fun.
Planning Your Backyard Storage Shed Transformation
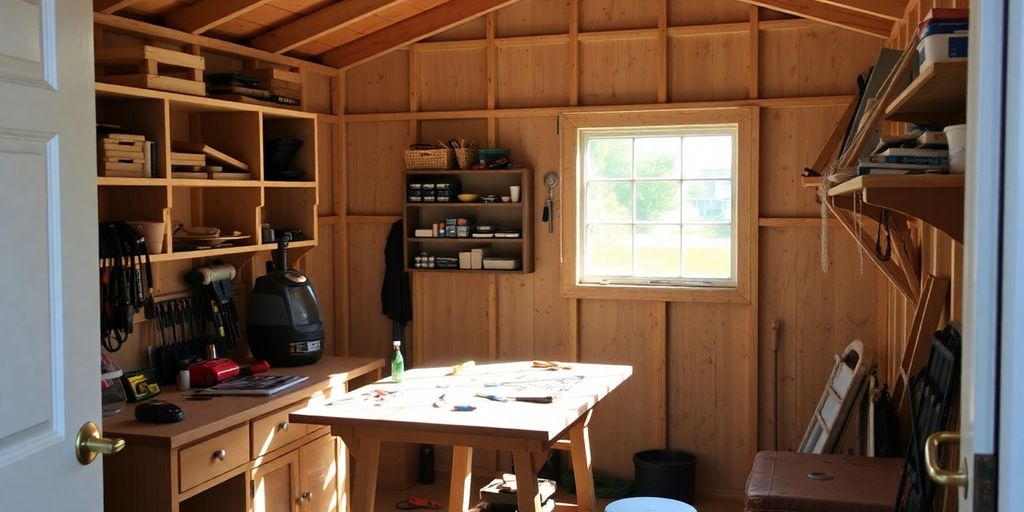
Assessing Your Current Backyard Storage Shed
Okay, so first things first, we need to really look at what we’re working with. I mean, really look. Don’t just glance at your shed and think, "Yeah, it’s a shed." We need to get down and dirty (maybe literally, depending on how long it’s been since you cleaned it). We need to evaluate the shed’s structural integrity, size, and any existing issues before we even start dreaming about turning it into a hobby room.
Here’s a quick checklist to get us started:
- Foundation: Is it level? Any cracks or signs of sinking? This is super important because a wonky foundation means a wonky hobby room.
- Walls and Roof: Check for holes, rot, or water damage. These are the things that will make or break our project. Patching things up now will save us headaches later.
- Size: Measure the interior dimensions. This will help us plan the layout and figure out what furniture and equipment we can realistically fit inside. Don’t overestimate!
- Existing Features: Does it have windows? A door that seals properly? Electricity? (If not, that’s a whole other project, but good to know upfront).
It’s also a good idea to take pictures and make notes of everything. Trust me, you’ll forget details later, and having a record will be a lifesaver when you’re trying to remember if that one corner had a weird stain or not.
Designing Your Dream Hobby Space
Alright, now for the fun part! Let’s think about what we actually want this hobby room to be. Are we talking painting studio? Woodworking shop? A place to build model trains? The possibilities are endless, but we need to narrow it down so we can plan accordingly.
Here are some questions to ask ourselves:
- What’s the primary hobby? This will dictate the layout and equipment we need.
- How much space do we realistically need for the hobby? Don’t forget storage!
- What kind of lighting is required? Natural light is great, but we’ll probably need supplemental lighting too.
- What’s the budget? This is a big one. We need to be realistic about what we can afford.
Let’s consider a few examples:
| Hobby | Key Requirements | Space Needs | Lighting Needs |
|---|---|---|---|
| Painting | Easel, table, storage for paints and brushes | Medium | Bright, natural light preferred, supplemental lamps |
| Woodworking | Workbench, power tools, dust collection | Large | Ample overhead lighting, task lighting |
| Model Trains | Train table, storage for trains and accessories | Medium | Good overhead lighting, adjustable task lighting |
Once we have a clear idea of what we want, we can start sketching out a layout. Think about workflow, storage, and how to maximize the space we have. It’s a good idea to draw a few different options before settling on one. Don’t be afraid to get creative! This is our space, after all.
Essential Upgrades for a Functional Hobby Room
Transforming a simple storage shed into a functional hobby room requires more than just moving your supplies inside. It’s about creating a comfortable, safe, and efficient space where you can truly enjoy your hobbies. Let’s explore the upgrades that will make your shed a haven for creativity.
Insulation and Climate Control Solutions
One of the first things we need to address is insulation. A shed that’s too hot in the summer or freezing in the winter isn’t going to be a place you want to spend much time. Proper insulation is key to maintaining a comfortable temperature year-round. We’ve found that spray foam insulation is a great option because it fills all the gaps and cracks, providing excellent thermal resistance. Fiberglass batts are another choice, and they’re usually more budget-friendly, but you have to be careful to install them correctly to avoid air leaks.
Consider these options for climate control:
- Insulation: Spray foam, fiberglass batts, or rigid foam boards.
- Ventilation: Install vents to allow for airflow and prevent moisture buildup.
- Heating/Cooling: A small window AC unit or a portable heater can make a big difference.
We learned the hard way that neglecting insulation leads to extreme temperature swings. Our first attempt at a hobby shed was basically unusable during the hottest and coldest months. Don’t make the same mistake we did!
Powering Your Creative Endeavors
Next up: electricity. Unless your hobby involves whittling wood with hand tools, you’re probably going to need power. Running electricity to your shed might seem daunting, but it’s a game-changer. Think about all the tools and gadgets you can use! We recommend hiring a qualified electrician to handle this part, especially if you’re not comfortable working with electrical wiring. Safety first, always.
Here’s a basic rundown of what’s involved:
- Permits: Check your local building codes and obtain any necessary permits.
- Wiring: The electrician will run wiring from your main electrical panel to the shed.
- Outlets and Lighting: Install enough outlets to accommodate your tools and equipment, and don’t forget about lighting! Overhead lights and task lighting are both important.
| Item | Estimated Cost | Notes |
|---|---|---|
| Wiring | $300 – $800 | Depends on distance and complexity |
| Outlets | $10 – $20 each | GFCI outlets recommended for safety |
| Lighting | $50 – $200 | LED lights are energy-efficient and bright |
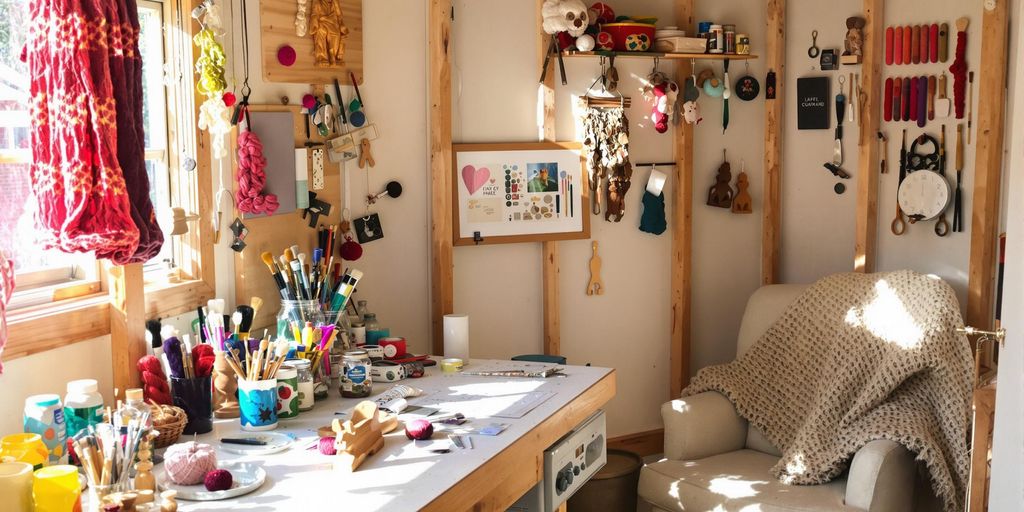
Furnishing and Organizing Your New Hobby Haven
Okay, so the walls are up, the electricity is working, and you’ve got a nice, dry space. Now comes the fun part: making it yours. This is where your hobby room really starts to take shape. We’re going to talk about how to set up your space so it’s not just functional, but also inspiring and a place you actually want to spend time in. It’s all about making the most of the space you have, and keeping things organized so you can actually find what you need when you need it. Let’s get started!
Optimizing Layout for Productivity
The layout of your hobby room is key to how productive you’ll be. Think about the flow of your work. What steps do you usually take when you’re working on your hobby? Arrange your furniture and equipment so that you can move smoothly from one step to the next. For example, if you’re a painter, you might want to set up your easel near a window for natural light, with your paints and brushes within easy reach. If you’re a model builder, you might want a large, flat workspace with good lighting and storage for your tools and materials.
Here are some things to consider:
- Traffic Flow: Make sure you can move around the room easily without bumping into things.
- Task Zones: Divide the room into different zones for different activities. This will help you stay organized and focused.
- Lighting: Good lighting is essential for any hobby room. Use a combination of natural and artificial light to create a bright and inviting space.
Consider the placement of your furniture carefully. A well-placed desk or workbench can make all the difference in how comfortable and productive you are.
Smart Storage Solutions for Your Backyard Storage Shed
Storage is a big deal, especially in a smaller space like a converted shed. We need to think vertically, and creatively. Shelving is your best friend here. Wall-mounted shelves can hold a ton of stuff without taking up floor space. Clear plastic bins are great for storing smaller items, and they let you see what’s inside without having to open them up. Pegboards are awesome for hanging tools and supplies, keeping them within easy reach.
Here are some storage ideas:
- Wall-Mounted Shelves: Maximize vertical space.
- Clear Plastic Bins: Easy to see contents.
- Pegboards: Great for tools and supplies.
- Rolling Carts: Portable storage that can be moved around as needed.
| Storage Type | Pros | Cons |
|---|---|---|
| Wall-Mounted Shelves | Saves floor space, customizable height | Requires installation, weight limitations |
| Plastic Bins | Easy to see contents, stackable | Can be bulky, may not be aesthetically pleasing |
| Pegboards | Keeps tools organized, easy access | Can look cluttered if not organized well |
Wrapping Things Up
So, we’ve gone through a lot, haven’t we? Taking that old storage shed and turning it into a spot for your hobbies might seem like a big job at first. But, as we’ve seen, with a bit of planning and some work, it’s totally doable. Think about it: a quiet place just for you, where you can really get into whatever you love doing. It’s more than just a shed; it’s a space that can bring a lot of good stuff into your life. We hope this helps you get started on making your own special hobby room. It’s a project that’s really worth the effort.
Frequently Asked Questions
How long does it usually take to change a storage shed into a hobby room?
The time it takes to turn your shed into a hobby room can change a lot. It depends on how big the shed is, what you want to do with it, and if you’re doing the work yourself or hiring help. Simple changes, like adding a desk and shelves, might only take a weekend. But bigger projects, like putting in insulation and electricity, could take several weeks or even a few months. Planning carefully and getting all your stuff ready beforehand can help speed things up.
Do we need special permits to change our storage shed into a hobby room?
Before you start, it’s a good idea to check with your local government office. Some places have rules about changing outdoor buildings, especially if you’re adding things like plumbing or electricity. You might need a permit to make sure your new hobby room is safe and follows all the rules. It’s always better to ask first so you don’t run into problems later.
What’s the best way to keep our new hobby room warm in winter and cool in summer?
Keeping your hobby room comfy all year round is super important. For colder weather, you can add insulation to the walls, floor, and ceiling. A small electric heater or a space heater can also help keep it warm. For hot weather, good ventilation is key. You can install a fan, add vents, or even put in a small window air conditioner. Making sure the shed is sealed well will also help keep the temperature just right.
Tags: Affordable Sheds, Long Lasting Sheds, Residential Shed Builder